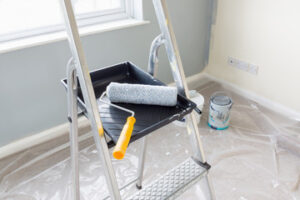
Interior painting is a transformative service that breathes new life into living spaces, reflecting moods and designs. It also protects surfaces from wear, moisture, and damage.
A thorough prep process is crucial to a quality paint job, including cleaning and surface preparation (patching holes, sanding, priming). Interior paint has lower concentrations of volatile organic compounds to protect indoor air quality. Contact Simplify Painting for professional help.
While the ombre color effect has long been popular beyond the hair salon, it’s now being used in interior painting to create a smooth transition from one shade to another. This decorative paint idea, characterized by the gradual deepening of a color from top to bottom, can give your room an opulent feel and help make your walls stand out.
The ombre paint trend has several different applications, from simple accent walls to full room treatments that involve the ceiling as well as the wall and trim. The simplest way to achieve this look is by simply applying a light tint of your chosen color to the top of the wall and blending it into a darker shade on the lower half.
Using a paint roller, apply a thin coat of the lightest color to your wall and allow it to dry. Next, using a larger brush, start applying the mid-color and blend it into the base layer. Finally, add the darkest color to the bottom of your wall, blending it with the mid-color as you go. This technique is easy enough for even the most novice DIYer to master, but it can be a bit time consuming.
If you’re unsure how to mix your colors to achieve the perfect ombré look, consult a color wheel for some guidance. Analogous colors (those that are directly adjacent to each other on the wheel) will blend seamlessly, while contrasting colors will create a more dramatic effect.
In addition to walls, the ombre painting technique can be used to create a beautiful transition on furniture as well. To get started, try painting chair or coffee table legs with a fading color and then move on to bigger pieces of furniture once you’ve gained some confidence with the technique.
The ombre effect isn’t limited to paint, either; fabric wall hangings can also offer an attractive and subtle ode to nature. Whether you choose a floral pattern or a scene depicting autumn leaves, these opulent wall hangings can serve as a stunning focal point for any room.
Striping
Stripes are a great way to create a feature wall or to add depth to a room. They are also a popular choice for hallways or rooms where a more uniform look is desired. Whether you prefer horizontal or vertical stripes, it is important to plan out your design beforehand in order to make the process go smoothly. Start by determining the width of each stripe. To do this, measure the height of the wall from ceiling to floor and divide by an odd number. This will ensure that each stripe is the same width. Once you have determined the width of each stripe, mark it on the wall with a pencil.
Before you begin painting your stripes, it is a good idea to prime the wall. This will help prevent the new color from bleeding under the tape. If you’re working with a scuffed or damaged wall, it may be best to repaint the entire surface in fresh base color. However, if you’re using your existing paint as the base, simply mask off and start the stripe pattern.
Once you have marked the wall with your pencil lines, use low-stick tape to seal off the areas that will not be painted. Be sure to place the tape exactly on your pencil line so that you get clean, crisp edges. If you want to be extra cautious, you can apply a thin coat of the contrast color to the edges of the tape. This will further protect the surface from bleeds and give you that nice, smooth edge.
Then, it’s time to start! Using a narrow roller, paint the first layer of your stripe pattern. Allow the paint to dry completely before applying a second coat. Allow this to dry again before removing the tape.
By implementing simple design elements like stripes, you can elevate your interior painting project to an entirely new aesthetic level. The design element adds a new, organising structure to the composition with direct relevance to the overall colour effect and can be worked out subtly or boldly as desired.
Stencils
Using stencils in interior painting is a great way to add patterns without overwhelming a room. Stencils come in a variety of designs and sizes, and you can even find some that are washable and reusable (but they will only last for so long before the paint saturates the fibers and weakens them).
When using stencils, it’s important to choose ones that are designed for the surface you’re painting on. If you’re painting over a brick wall, for example, you’ll want to choose a textured stencil that will hide any flaws and give the wall texture. You’ll also need to choose a paint that is compatible with the stencil—a matte finish can create an understated look while a gloss or satin finish can add a bold statement.
To ensure that your stenciled pattern is crisp, clean, and consistent, be sure to apply a good base coat before applying the stencil. This will help ensure that the color doesn’t lift during the painting process, and it will also create a smooth canvas for the stencil design. It’s also a good idea to apply the base coat in a color that coordinates or contrasts with the stencil—this will help create a more eye-catching effect.
Before beginning any stenciling, be sure to prepare your workspace by laying down a drop cloth and covering any furniture or flooring you don’t want to get paint on. It’s also a good idea (especially for large areas) to use a foam roller or stencil brush, which will help you apply the paint evenly and avoid bleeding under the stencil. Finally, be sure to choose a high-quality stencil that is durable enough to stand up to the wear and tear of the painting process.
Once you’re ready to begin, start by lining up the stencil with the registration marks on the previous application and carefully securing it in place. Then, proceed to paint over it—being careful not to cover the registration marks. When you’re done, be sure to let the paint dry completely before removing the stencil. If necessary, you can use a hairdryer or fan to speed up the drying process.
Gradient
Painting interior surfaces is one of the most impactful and cost-effective ways to freshen up a room. It not only enhances the ambiance of a living space, but it also protects walls from moisture and other elements that cause damage. With the right color and texture choices, your home can be transformed into a beautiful oasis of peace and serenity. In addition, specialized interior painting techniques like stenciling and blending can elevate the aesthetic of your living space.
Gradients, or smooth transitions between colors, are a powerful design tool that can transform any wall. They can add depth, dimension, and an ethereal quality to any piece of artwork or decor, making them perfect for accent walls and custom furniture designs. Whether you’re blending dark to light or transitioning between completely different hues, there are endless possibilities for creating gradient effects.
To create a gradient, first select your base color and choose a shade that is darker than it. Next, choose the gradient stop values for each end of the gradient. The gradient stops are the points where the gradient changes from the base color to the final destination shade. Generally, the smaller the value for a particular gradient stop, the closer it will be to the base color.
When you’re ready to begin, carefully outline the gradient with painter’s tape and prep the surface for painting. Be sure to clean the walls, patch any holes and cracks, and sand them lightly for better adhesion. Using the right primer can also help ensure a long-lasting finish. Additionally, use a high-quality interior paint that is low in volatile organic compounds (VOCs) to improve indoor air quality and prevent health hazards.
Once the walls are prepared, apply a thin coat of your chosen base color. Once it dries, you can then start on the final shade of your gradient. It’s important to apply a few thin coats of paint rather than one thick coat, as this will help the colors blend seamlessly without any harsh lines.
Creating a seamless, gradient effect is not an easy task and requires patience, precision, and practice. It is also important to select a high-quality paint that dries quickly and has a wide color range for smooth blending. Using a spray bottle to maintain moisture can also help extend the blending time and reduce any muddy appearance.