A roof protects the interior of a house from the elements–scorching sun, heavy rain, snowfall, and gusty winds. Proper roofing materials channel rain and melting snow away from a home, preventing water infiltration and structural damage.
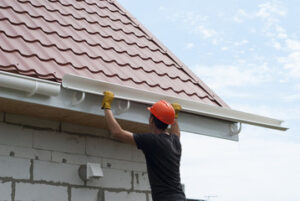
Installing a roof involves several steps: starting at the eaves, tab shingles are applied in a staggered pattern. Flashing is installed in valleys and around dormers, stack vents, and chimneys to prevent leaks. Visit https://www.fivestarroofingandcontracting.com to learn more.
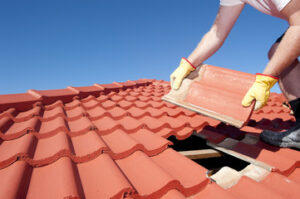
A strong roof provides protection against storms, heat, cold, and other environmental elements. Professionals ensure a watertight membrane for long-lasting security. They also install proper flashing around chimneys, vents, dormers and other roof penetrations to prevent leaks. Finally, they finish the job by placing ridge cap shingles for a clean, attractive appearance and added protection from the elements.
Many roofing professionals also recommend installing a moisture barrier (also known as an ice and water shield or a tar paper) over the entire roof deck to protect it from moisture. This is especially helpful for climates that experience freezing winter weather, which could cause ice dams and subsequent leaks.
To prevent damage to your lawn or flowerbeds during the roof installation process, mowing down grass to a reasonable height and shutting off automatic sprinkler systems a day or two prior to starting the job is recommended. In addition, you can help protect your home and belongings by securing sheds, patios and other outdoor equipment with tarps and moving out expensive landscaping items to a safe location during the construction period. Rigid temporary protection is also deployed on the roof for hoist landing areas, rooftop storage and heavy access/traffic conditions and promptly removed upon completion of the work.
Drainage
The drainage system is an important component of roof installation. It ensures water is properly directed away from the building, preventing moisture damage and other serious structural problems. It also mitigates the risk of mold or mildew growth and enhances energy efficiency. A professional roofing contractor will thoroughly inspect the drainage system and make any necessary repairs.
One of the most common forms of roof drainage systems is an inner drain. This is most commonly used in flat commercial roofs and small residential homes. The drain sits beneath the roof and is connected to a piping system inside the building. This allows the pipe to operate in any weather without the fear of freezing or clogging. Inner drains can be more expensive than gutters and may require regular maintenance by a roofing professional, but they provide a reliable source of water removal and prevent moisture damage.
Another popular option for roof drainage is a scupper drain. These are installed in the soffit area and can be connected to rainwater leaders running along parapet walls or through an opening in the wall. Scupper drains can be more expensive than gutters, but they offer a quick and efficient method of drainage and are easy to maintain.
Local building codes and regulations often govern the design of drainage systems for flat commercial roofs. It’s essential to understand these requirements when installing a new roof or replacing an old one.
In addition to scupper drains and internal roof drainage systems, professional roofers install other forms of roof protection to help with drainage. These include ice dam barriers and synthetic barrier materials that prevent melting ice from backing up under the shingles and penetrating the sheathing underneath. These are especially important in regions with harsh climates and frequent snowfall.
In addition to these waterproofing measures, roofers also install drip edge flashing on the eaves and valleys, as well as on the edges of dormers and around chimneys and vents. These flashings are typically made of galvanized steel and aluminum and nailed to the sheathing, ensuring a watertight seal in vulnerable areas.
Durability
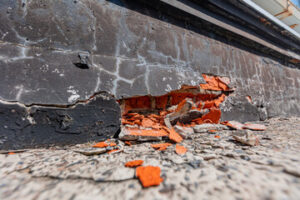
Over time, harsh weather conditions can deteriorate residential roofs. Whether the result of aging or insufficient maintenance, a damaged roof leaves your home susceptible to leaks, mold, mildew, and other issues. A new roof installation provides superior protection that keeps you and your family safe and comfortable. Moreover, it offers energy efficiency and reduced utility bills by regulating indoor temperatures, reducing the strain on heating and cooling systems.
The longevity of a roof depends on a number of factors, including the materials employed and its upkeep. Asphalt shingles typically last between 15 and 30 years, while metal roofs are enduring and can last up to half a century or more. Clay tiles are another popular option with a long lifespan and offer an elegant appearance for homes of any architectural style.
Ethylene propylene diene monomer or EPDM roofing is a durable, waterproof material that is used in flat and low-slope roof construction. It can be installed in large sheets, which reduces the number of seams on a roof and improves water resistance. Other roofing materials with long lifespans include fiberglass, polycarbonate, and slate.
When you invest in a high-quality roof installation, the manufacturer warranty covers repairs and replacements for a period of years. This can protect you from hefty out-of-pocket expenses and ensure your home’s value.
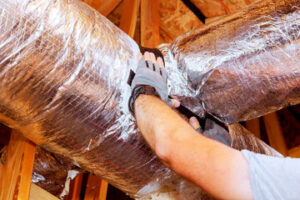
A new roof installation also includes insulation and a coating system to help you maintain the integrity of your home’s structural supports. In addition, it’s a tax-deductible investment because it boosts your property value and enhances curb appeal. For more information about how to add lasting durability to your home, consult with a qualified roofing contractor. A professional will perform a detailed inspection to identify any potential problems and recommend the best course of action. Getting your roof regularly inspected can add decades to its life expectancy and reduce the risk of costly repair or replacement.